
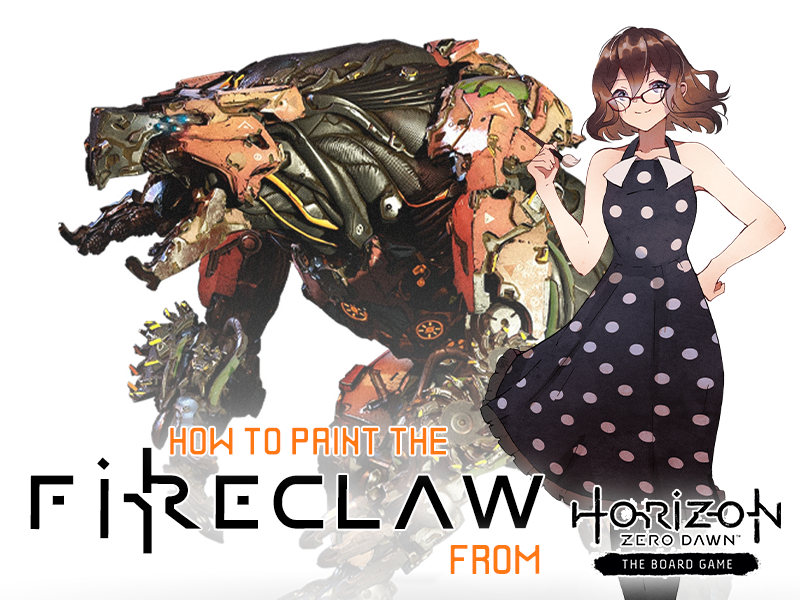
The Fireclaw is a huge, terrifying machine-beast that makes its home in the Frozen Wilds of the Horizon Zero Dawn setting. With it’s large claws, rotary blades and spewing jets of flame, it’s not a creature you want to bump into on your trek across the tundra. This bear-like creature is one of the toughest opponents you will face on your adventure, so prepare well… by reading this painting guide!

In this tutorial I will show you how I painted this incredible miniature from the Horizon Zero Dawn: The Board Game Fireclaw Expansion, so grab your Focus and your paints and let’s get hunting! Huge thanks to Steamforged Games for sponsoring this tutorial!
In case you’ve been exiled from your tribe for years like Aloy and aren’t aware, the Fireclaw is a monstrous machine from the Horizon Zero Dawn video game. The game was released in 2017 to rave reviews with over 20 million copies sold as of November 2021! The follow up, Horizon Forbidden West, followed in early 2022 to much fanfare and the franchise has even expanded to comic books, a planned television series and, of course, the fantastic board game via Steamforged Games.
Steamforged Games have taken everything that made the video game so special and distilled it perfectly into a table-top format. The expansion pack miniatures (they aren’t so miniature!) being my personal favorites. The Fireclaw, Stormbird and Thunderjaw look simply incredible!
You can get the Fireclaw from Steamforged Games right HERE!
I’ll be working closely from the image above for reference, if you are also painting a Fireclaw I would recommend having various images of the creature on standby to help identify areas of different material and colour.

The first step, as you may have guessed, was to prime the model. I have used a neutral grey primer for this miniature, as there are a lot of grey and black tones across the Fireclaw. Although a smooth coat is preferred, if there is a little roughness, it can help make the model look a little weathered so it’s not neccessarily a bad thing in this case. You can see that the weather seems to have caused a little texture on the primer on the arm here – but I quite like how it works on this model.
This model also comes pre-assembled in the box, and attached to its base. This makes it an ideal project for a hobbyist who doesn’t enjoy the often complex assembly of hard plastic wargaming kits. All of the Horizon Zero dawn models come either pre-assembled or in easy push-fit sets.


With the primer dry and ready to go, I began by picking out various areas of the “flesh” with Vallejo German Grey. This went onto areas like the muzzle, inside the mouth, the various softer areas like the waist and any areas of internal machinery poking out between armour panels. Remember to keep your paints thin and work in layers if the colour of the primer still shows through. I use a wet pallette to help my paints stay thin and usable for longer, but if you use a dry palette remember to add a little water to your colours.


After filling in much of the body with the darker grey, I set about picking out the sinewy cable “muscles” along the neck, arms, torso and legs. This is a sort of coppery colour, so I used Tin Bitz from the Nostalgia ’88 range. This gives a great metallic dull copper effect, without being overly bright.


To further distinguish various areas, I used Contrast Basilicanum Grey to filter a mid grey between the primer colour and the German Grey. This was applied over the feet, claws, wrist “saws”, and various other small details. This just helps break up more of those flat areas and vary the tones, implying different types of metal being used across the body.


Next up, it’s time to get MESSY! It’s time to go over everything, including the “bear” (heh heh) grey primer with Nuln Oil. This is a thin shade paint which slightly tints the surfaces but most settles into the recesses creating clear definition between each area and panel on the model. As you can see, it’s pretty much liquid talent in a bottle!


With the Nuln Oil dry, my next step was to drybrush. I went over everything but the copper with Mechanicus Standard Grey as a strong drybrush, then a lighter drybrush of Dawnstone. We don’t want to go too light, as most of these areas shouldn’t draw the eye compared to the brighter parts to come.


To bring out the more metallic parts of the model, a heavy overbrush of Leadbelcher was applied over the claws, feet, spinning blades and face, as well as a few key areas which looked like moving parts or joints. This is similar to a drybrush but with a little more paint left on the brush so it catches the majority of the area, just leaving the recesses darker. I then apply a little more Nuln Oil over these areas just to bring the shininess down slightly.


Time to start getting some colour down on the main armoured panels across the Fireclaw. There are mostly on the legs, arms, upper back, and the face. For this I used Squig Orange, which is a reddish, subdued orange tone. Orange paints tend to struggle to cover well, so build up over multiple layers. If it looks like the leg armour in the picture above where you can see the grey still showing through, wait until the layer is thoroughly dry then apply another thin layer. You may need 3-4 coats to build up a nice solid colour.


I applied a coat of Fuegan Orange shade over the orange to punch the colour slightly and get some shading into the recesses. After this I spend a little time going around the model with grey to clean up some areas where the orange spilled out of the lines!


To highlight the orange and create more depth, I made a roughly 50:50 mix of Cadian Fleshtone and Squig Orange, and drybrushed this over all of the orange areas. This catches the raised details and adds a lot of visual interest to the coloured areas.


Now comes a fun part, weathering the orange areas up a bit! As you can imagine, creatures like the Fireclaw get dinged about a bit in combat and from just life in the Frozen Wilds! So here I take Thondia Brown (you could also use Rhinox Hide or any other darker brown for this) and do dots and dashes along the edges and raised curves where paint would be likely to get chipped off. You can also add scratches here and there too. I thinned it down a little and painted it into some of the recesses to help convey depth, then painted the top of the base brown in preparation for the basing later.


To prepare for the glowy green and yellow-fire effects, areas like like the cabling, “eyes”, heat vents, and shoulder fire sacs are painted with Corax White. This will give a super bright effect once we add some Contrast paints to these areas!


A bit more bright colour! I used Karandras Green contrast on the arm cables and fire sacs on the shoulders. The “eyes” got painted with Aethermatic Blue, and then the heat vents and neck cables recieved a coat of Iyanden Yellow contrast. I also thinned the yellow down and applied it around the stomach area where the majority of the heat vents are.


I used Phalanx Yellow to highlight some of the yellow areas, then used Warboss Green on the green areas to smooth off the colour towards the centre and reduce any patchiness, with Moot Green used as a highlight on the cables. Looking at the concept art I noticed the orange panels did have some subtle variance, so I used Berserker Bloodshade over some of the panels to darken them slightly and bring them closer towards red tones.

Now we’re in a good place with it, I pick out some extra details like the yellow stripes on various parts of the body, and on the blades at the forearms. I also use Corax White to paint on some of the symbols here and there around the orange areas!


At this point I noticed the black areas needed a little more work – they’re a sort of carbon fibre texture in-game, but because replicating that would be extremely difficult, I drybrushed on a mix of German Grey and Leadbelcher, with a final stipple of the same mix to add texture and a shine to these areas.
Then I took Mythril Silver, and dotted it into the edges where the brown had earlier been used to create weathering, indicating “bear” metal showing through.
After this I decided to work on the base a bit, so I used Geek Gaming Scenics scrublands from their base ready sets, then added a bit of Valhallan Blizzard texture paint.

At the back of the model, there’s a power pack of some kind. I wasn’t able to find any clear pictures of this, but it had coils and exposed vents, which I painted Enchanted Blue and highlighted with a mix of that paint and Vallejo Verdigris paint to create a gentle glow effect! For the final step I painted the edge of the base with Corax White… and called it done!
Check out the final piece below!


And there you go! I’m equal parts proud and terrified of this very angry boy! Thanks once again to SFG for providing the Fireclaw Expansion for me and contacting me to create what I hope is a fun painting guide for you all. And don’t forget to check out the Horizon Zero Dawn core games over at the Steamforged Games website!

Above: The core set! I’m a big fan of the included game boards which show the routes the creatures traverse, just like in the video games!


